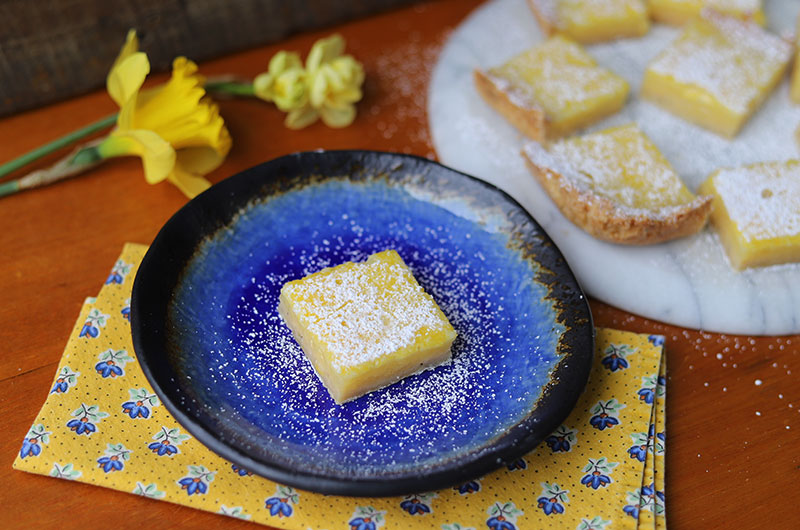


“It’s always sunny when there are lemon bars on the counter,” my mom used to sing when it seemed that the clouds would never clear and/or my teenage demeanor was at its worst. While I didn’t appreciate her cheery personality at the time, it’s proof that she was mentoring me in the healing powers of dessert. These lively, tangy lemon squares are just one of many examples (see Baking Together columns #1 - #32!) of my pursuit to spread happiness through baking and sharing. I think you’ll agree that my mom was spot on – a bite or two of these beauties will make any day a happier one.
The recipe doesn’t stray too far from Mom’s although I have taken a few liberties. In the crust, I’ve added lemon zest and poppy seeds for a punch of added flavor and a bit of crunch, respectively. The additions are not mandatory, but if you’ve got the ingredients, I suggest giving them a try. Let us know what you think!
For mixing, I’ve given directions for a stand or handheld mixer, but honestly, a sturdy spoon and a little elbow grease will get the job done too. Press the dough into the bottom of the prepared pan and a bit up the sides as well. This border will help keep the filling where it belongs. Bake until the crust is lightly browned.
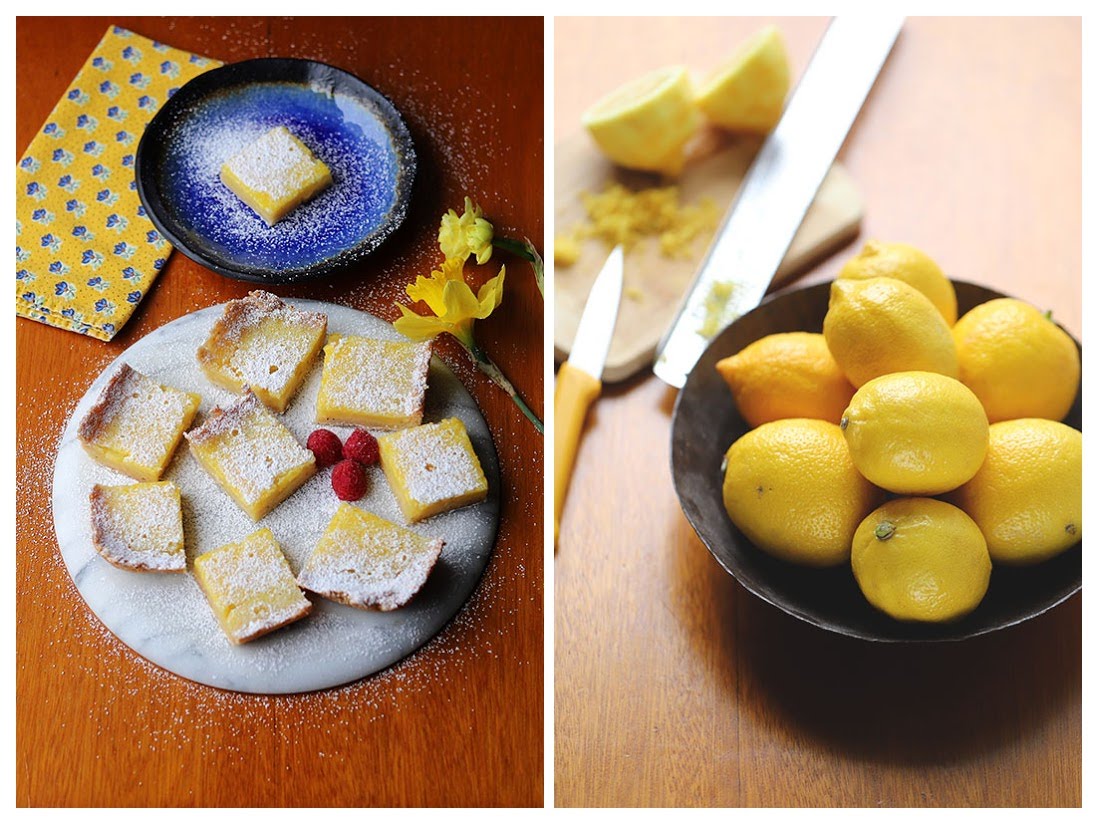
While the crust is in the oven, turn your attention to the creamy, sweet-tart filling. For easy pouring, I mix it up in a four-cup glass measure (the spout makes a difference) but a regular old bowl works just fine. A small amount of heavy cream helps tame the tang, but either half and half or light cream will also work fine. Whisk in a few eggs and you’re ready to bake.
Baking the lemon bars is similar to any egg-based custard dessert like cheesecake or pumpkin pie. The goal is to bake until the center jiggles when the pan is gently nudged (think wiggly Jell-O cubes). You might think it’s undercooked but it will continue cooking as it cools. If you happen to overbake them, the filling will crack as it cools but worry not as they will still be delicious. If the cracked appearance is bothersome (and even if it isn’t!), lightly dust with confectioners’ sugar and top with a few sliced strawberries or raspberries.
Make sure to check out the Kitchen Notes below for a few other tips and tricks.
Kitchen Notes
Short-Cut Alert
As a substitute for freshly squeezed lemon juice, you can use Minute Maid Frozen Lemon Juice (not lemonade). You won’t have the zest to add to the crust but you’ll save time and effort as well as some pocket change (lemons can be pricey!) without sacrificing the tart and tangy flavor.
Tame The Tang
For a slightly less tangy but still very lemon-y filling, add an additional tablespoon of the cream for a total of three tablespoons.
Limit The Jostling
Arrange a wire rack near the oven so you can add the filling and move it back into the oven with the least amount of jostling. This, plus the crust’s higher sides, helps to keep the filling on top and not under the crust.
Non-Stick Cover
To make a cover for your bars that won’t stick to them, arrange a large piece of plastic wrap on the counter. Spray or pour a drop of neutral oil onto the center and, using a small piece of paper towel or a pastry brush, spread it evenly over the surface leaving a 2-inch border. Place the plastic, oil-side down, over the chilled bars and, voila, easy on and easy off without marring the surface. P.S. This covering works for cakes, custards and any dessert with a sticky topping.
Freeze ‘Em
These bars freeze and thaw beautifully. Arrange the bars close together but not touching on a cookie sheet or flat plate and freeze until very firm. Once frozen, arrange the bars in a container separating layers with waxed or parchment paper and freeze for up to two months. To thaw, take out as many bars as needed and place on a wire rack set on the counter. They are yummy even when partially frozen.