


I love surprising friends and acquaintances with tokens of my appreciation throughout the year; I don’t need an occasion, but since the holidays are upon us I’ve got a theme — gingerbread!
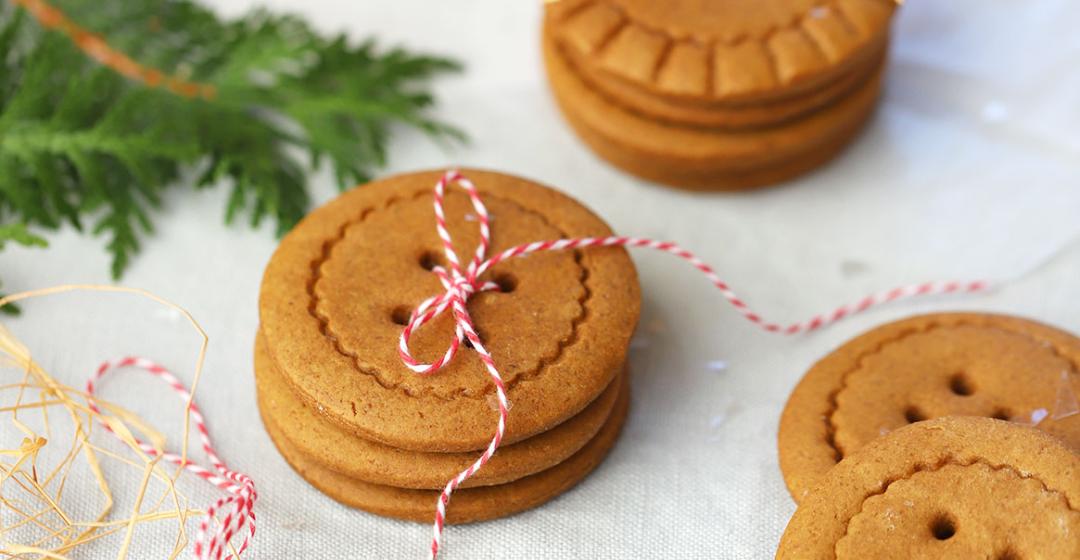
These adorable gingerbread “buttons” have a whole lot going for them. You may have seen cookies like this on Instagram or online (Nourish & Nestle inspired me) and thought they would be hard to make. Not so! There’s no tricky icing or frosting involved here and yet they have tons of personality. With just a few simple tools — a wooden skewer, a small straw, and some round cookie or biscuit cutters — you can make cookies that are as great looking as they are delicious.
I use my favorite gingerbread recipe here, the same one I use to make tiny gingerbread houses. It has just the right amount of spice and a great texture. It’s nice and crisp around the edges and just slightly chewy in the center. The dough comes together easily, and it’s so much fun to press decorative marks and patterns into the buttons before you pop them in the oven.
After baking, you can decide how to present the cookies. They’re pretty fetching on their own, but I like to lace up stacks of buttons with baker’s twine (a darning needle is a great help here) and sneak them onto coworkers’ desks with a pinch of fake snow! But you could also string them together with thin ribbon to make a garland for your tree.
Yields approximately 45 cookies
- 1 pound 4 ounces (20 ounces) all-purpose flour
- 2 ½ teaspoons ground cinnamon
- 1 tablespoon ground ginger
- 1 ½ teaspoons baking soda
- ½ teaspoon table salt
- ¼ teaspoon ground cloves
- ½ teaspoon ground nutmeg
- 5 ounces (10 tablespoons) unsalted butter at room temperature
- 4 ½ ounces dark brown sugar (light brown will work too)
- 1 ½ large eggs (crack and whisk together two large eggs and remove 1 1/2 tablespoons)
- ¾ cup unsulphured molasses
- 1 teaspoon vanilla extract
Make the dough
1. In a medium sized bowl, sift together flour, ground cinnamon, ground ginger, baking soda, salt and ground cloves. Set aside.
2. In the bowl of a stand mixer fitted with the paddle attachment*, combine the butter and sugar. Beat on medium-high for about 5 minutes until light and fluffy.
3. Add the egg and mix well.
4. Add the molasses and vanilla and mix well.
5. On low speed, add the dry ingredients and mix until a very stiff dough forms. Turn the dough onto a flour-dusted work surface and knead gently until you have a nice smooth ball of dough.
6. Divide the dough into two balls, flatten and wrap in plastic wrap. Chill in the refrigerator for a few hours or overnight.
7. Heat the oven to 350 degrees F and line cookie sheets with parchment paper.
8. Remove a dough disc from the refrigerator, unwrap and place on a lightly floured work surface. Lightly flour the top of the disc and use a rolling pin to roll the dough to an even thickness of a little less than ¼-inch. Check your dough several times during rolling and add another light dusting of flour whenever necessary to keep the dough from sticking to the work surface or the rolling pin.
Cut, mark, and bake the buttons
1. You will need round cookie cutters in assorted sizes. I begin with a 2.5” round. Cut out as many rounds as you can and place on a parchment lined baking sheet at least an inch apart. (Gather your scraps and gently knead into smooth ball, wrap in plastic and refrigerate for a few minutes while you prepare the buttons for baking.)
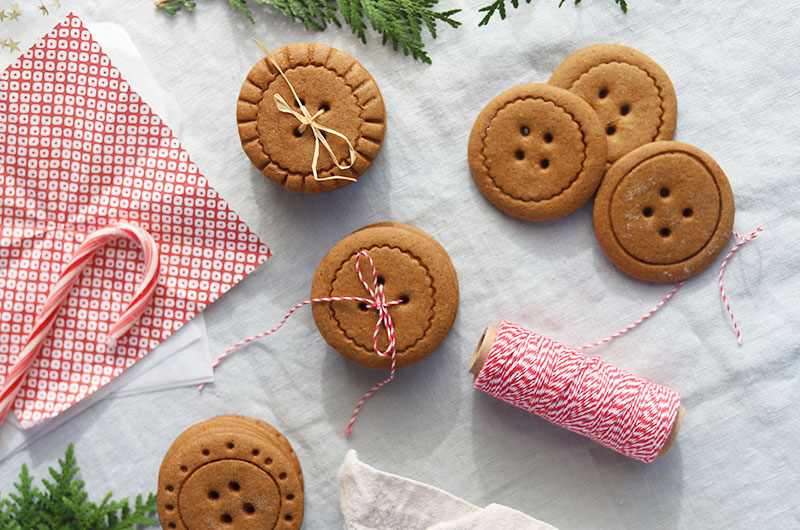
2. To mark the inner circles use smaller cutters (with fluted edges if you like), pressing down into your dough just deep enough to make a mark but not cutting all the way through. Simple concentric rings are perfect, but it’s also fun to add decorative dots or marks. A toothpick or the blunt end of a small bamboo skewer works well for this (see photos above).
3. Use a slim plastic straw to poke a two- or four-buttonhole pattern in the center of the cookies. The little hole plug comes out easiest if the dough is cold and you twist the straw a few times before you pull it out. Chill the prepared buttons for 15 minutes in the refrigerator to reduce spreading during baking.
4. Bake for 16 to 18 minutes, or until crisp but not darkened. Let rest on the baking sheet for 5 minutes before transferring to a wire cooling rack. Let cool completely and store in an airtight container.
*Note: If you don’t have a stand mixer you can begin making the gingerbread dough by using a hand mixer. When it is time to add the dry ingredients, mix them in by hand.
.