


 2 comments
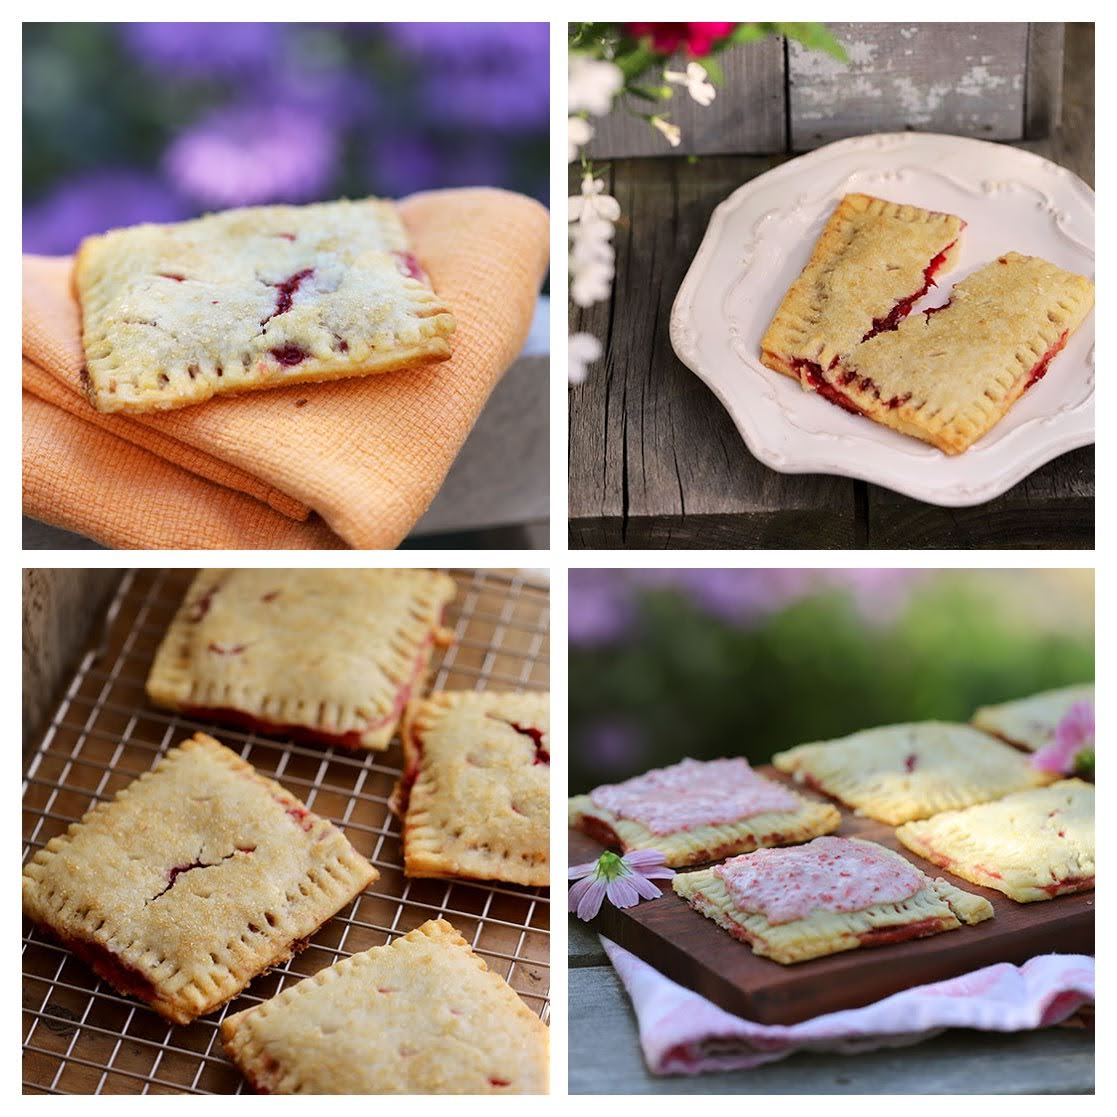
These Strawberry Hand Pies are inspired by the iconic store-bought toaster cakes (aka Pop Tarts), but they’re oh-so-much better. They’re a perfect snack for anytime of the day – just the right amount of crunch, sweetness and berry-ness. If you’re feeding a breakfast crowd, assemble the pastries, cover, and stow them, unglazed and unbaked, in the fridge overnight so they are ready to glaze and bake first thing in the next morning.
I know making pie dough can be intimidating, but I think you’ll find this one very easy to make (it whizzes up in a food processor), and because there’s no need for chilling and resting time, you can roll it out straight-away. It’s also very forgiving, so patching up cracks is a no-brainer.
Yes, there is a bit of challenge here – you’ve got to have your ruler close by and roll out a long piece of dough so that you can cut it into squares. You’ll need to be a little patient with yourself, but I promise you, you can do it and these tarts are absolutely worth the effort. (Since days are getting hot, I recommend making and rolling the dough in the cooler parts of the day or in an air-conditioned kitchen.)
You might think cooking the berry filling in advance would be unnecessary but it’s an important step. While ripe, freshly picked strawberries are sweet and delicious, they contain a lot of water which will lead to soggy tarts and lackluster fillings. Cooking off the excess water concentrates the berry flavor leaving a lovely, thick jam-like filling which is ideal for these little tarts. Win-win.
Before you start baking, be sure to read all of the tips (below, following the recipe). You can also find them reposted in Abby’s latest column, Baking Together #16. Please be sure to leave your notes in the comment section below after making the recipe!
Makes 10
For the Filling
- 12 ounces fresh strawberries, rinsed, dried, and hulled
- 1/4 cup (1/8 ounces) freeze-dried strawberries, finely crushed (optional but worth it, see note)
- 2 tablespoons granulated sugar
- 1 1/2 teaspoons unbleached all-purpose flour
- Pinch of table salt
For the dough (makes enough dough for ten, 3 1/2-inch squares)
- 3 cups (13 1/2 ounces) unbleached all-purpose flour
- 1/4 cup (1 3/4 ounces) granulated sugar
- 1 teaspoon table salt
- 16 tablespoons (8 ounces) cold unsalted butter, cut into small cubes 1/4 cup (2 ounces) very cold water
For the assembly
- 3 tablespoons heavy cream
- Coarse sanding sugar (optional)
For serving (optional)
- 1 recipe Creamy Sugar Glaze with 3 to 4 crushed freeze-dried strawberries stirred in
Make the filling
1. Cut the strawberries into 1/2-inch pieces (2 packed cups/about 11 ounces). Put them in a medium skillet or pot with the freeze-dried strawberries, if using, sugar, flour, and salt and toss until combined.
2. Cook over medium-low heat, stirring, until the strawberries are very tender and the juices have released and the mixture has thickened, 5 to 8 minutes. (You should have about 1 cup of chunky, jam-like filling. If you’re not sure if the mixture is thick enough, measure it in a pyrex glass measure to see if it is 1 cup. If not, return to the pan and continue cooking.)
3. Slide the pan off the heat and set aside, stirring frequently, to cool completely. (The mixture will shrink in volume as it cools to about about 2/3 cup.)
Make the dough
1. Put the flour, sugar and salt in a food processor and pulse once or twice until blended. Add the cold butter and briefly pulse two or three times until the butter pieces are slightly broken up.
2. Drag a spatula around the middle of the dry ingredients to make a small gully. Drizzle the water into the gully and pulse until the ingredients form moist dough crumbles, 1 to 3 minutes. Scrape the dough into a pile on the counter and divide into two equal piles (about 12 ounces each). Using your hands, press and shape each pile into a 6-inch square. Lightly flour your rolling surface. (If you have an extra-large cutting board or rolling mat, turn it so that the longer side is perpendicular to you; it is easier to roll the long piece of dough this way.)
3. Working with one square at a time, keeping the other one covered, roll the dough to a rectangle slightly larger than 7 1/2 x 19 inches, turning, flipping, and lightly flouring as needed. If large cracks form along the edges, press them together with your fingertips.
4. Using a large knife or a pizza wheel and a ruler, trim the edges to get a neat 7 x 17 1/2 rectangle. Repair any cracks along the edges by dampening the cracked area and gently pressing a small piece of the dough scraps onto the area and trim as needed. The dough is very forgiving; don’t worry if you have to patch.
5. Using a sharp knife or pastry/pizza wheel, cut the dough into ten 3 1/2-inch squares. Arrange the squares on a cutting board or cookie sheet, cover with plastic and repeat the process with remaining dough.
Assemble and bake the hand pies
1. Line a cookie sheet with parchment paper or a nonstick liner and have the heavy cream at the ready.
2. Arrange 10 squares on the prepared pan. Portion the strawberry filling equally among the squares (4 teaspoons/23 grams)and, using a small offset spatula or your fingertips, spread as evenly as possible (it’s a little chunky) leaving a 1/4-inch border of dough. Working with one square at a time, brush the edges with the heavy cream. Arrange one of the remaining squares over the filling and press around the filling. Using the tines of a fork, gently press the pastry edges to seal.
3. Slide the pan into the refrigerator (no need to cover) while the oven heats. Arrange a rack in the center of the oven and heat the oven to 375°F.
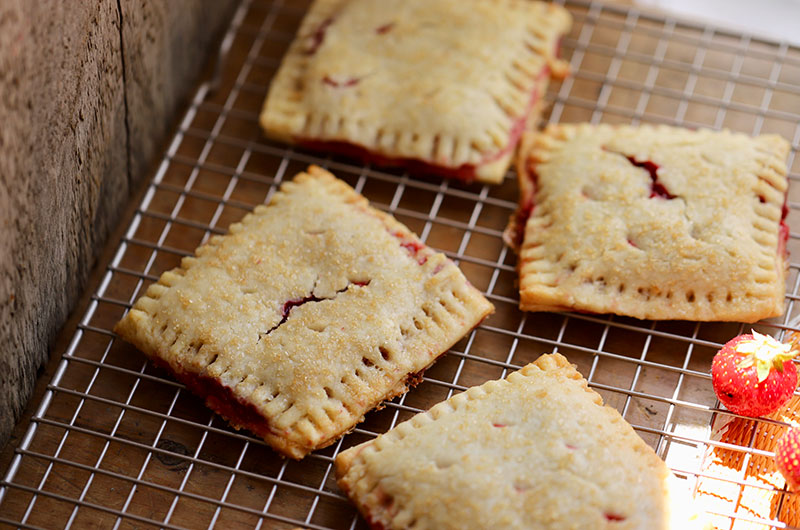
4. Lightly brush the top of each tart with heavy cream and sprinkle evenly with the sugar, if using. Using the tip of a small, sharp knife, cut 2 or 3 small slits in the top crust to let steam escape while baking.
6. Bake until the edges are deep golden brown, 23 to 25 minutes. Move the sheet to a rack and let cool for 10 minutes. Carefully transfer the hand pies to a rack and let cool until warm or, if frosting, to room temperature.
Tips
A note about freeze-dried strawberries
Even when I’m using the ripest of berries, I like to amp up their berry-ness by mixing in some crushed freeze-dried strawberries. Because they are dehydrated (and unsweetened), they add an instant burst of extra-intense strawberry flavor to the filling or, for that matter, to anything you stir them into (think smoothies, frostings, ice cream, etc). I’ve listed them as optional but they sure do lend a boost and they also add a pretty-in-pink color to the icing, if you chose to frost your little tarts. I find them in the health food aisle at my local grocer and they are widely available for online ordering. If the only item in the ingredient list is “strawberries,” then that’s your brand.
Make a blueberry variation
I’ve tested this filling using fresh blueberries. I use the same weight (12 ounces) of blueberries as I do of strawberries. Then I add 2 tablespoons of water along with the same amounts of the other ingredients in the filling and cook as directed. While I haven’t tested with other berries or tree fruits, I suspect they make delicious substitutes for the strawberries. Follow the same guidelines as I mention for the blueberry sub-in and follow your instincts and trust your senses. Don’t forget to share what you’ve made in the comments below the recipe. Inquiring baking minds want to know!
Glazing & Frosting
- The recipe calls for brushing the tarts before baking with heavy cream and coarse sugar. The combo adds a light sheen and a delicate crunch to the top. And I think the hand pies are plenty delicious this way. But if you want to add a little frosting (after the hand pies cool), leave off the heavy cream and sugar topping when baking.)
- To frost, make a batch of Creamy Sugar Glaze and stir in 3 to 4 teaspoons crushed freeze-dried strawberries until well blended. You’ll want the sugar mixture to be on the thicker, more spreadable side so it sits nicely on top of the tarts.
- Remember to frost them just before serving or the crusts will get soggy. One word of caution: I know it’s tempting to frost the warm tarts but the heat will melt the icing. Give them some time to cool off before spreading with the frosting.
Make Aheads
- The dough can be prepared, covered, and refrigerated for up to 2 days or frozen for up to 3 months. Thaw in the refrigerator overnight and soften at room temperature until pliable before rolling.
- The filling can be made and refrigerated for up to 2 days before using. Bring to room temperature before assembling.
- The tarts can be assembled without the heavy cream or sugar, covered with plastic, and refrigerated for up to 1 day before glazing and baking. They can also be frozen up to 1 month. Thaw at room temperature while the oven heats glazing just before baking.


Comments (2)