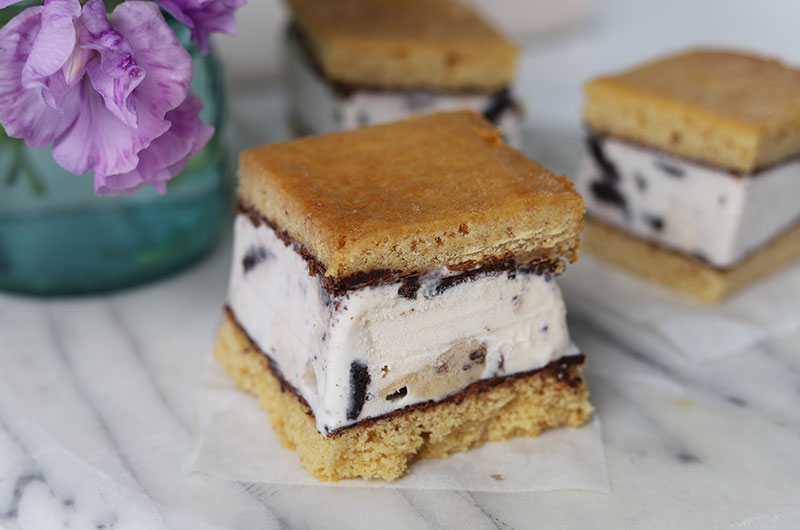


Breaking news for ice cream sandwich lovers on- and off-island: We're making these treats even better and even more irresistible by busting out a homemade version of the classic just for you! Building your own ice cream sandwiches is easy and super fun, and with August upon us, there’s no better time to start this fun DIY project than right now. These self-contained and pre-portioned sandwiches are the quintessential summer treat loved by everyone - from the young to the not-so-young.
Only three (THREE!) components are needed: your two favorite, store-bought ice cream flavors (sorbet works too), the baked and cooled cookie layer (recipe below), and some melted chocolate (you could leave it out but it adds a snappy texture, and, well, it’s chocolate). Save for some hands-off freezing time and some plastic wrap, that is all you’ll need. This is one project that is too easy to pass up.
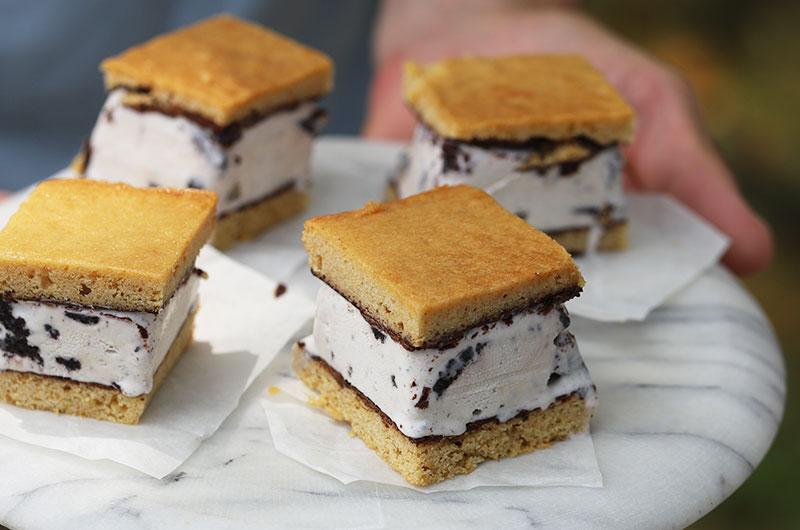
I keep a batch (or two) of individually wrapped ‘wiches stowed in the freezer for afternoon snacks or impromptu barbeque drop-ins. I’ve also had success with serving them at beach picnics by tucking them into a well-insulated cooler with some dry ice – works like a charm. The bottom line is these sandwiches are easy to make, easy to serve and will make everyone smile. I don’t think you can ask for more than that.
Kitchen Notes
The Right Texture for the Cookie Layer
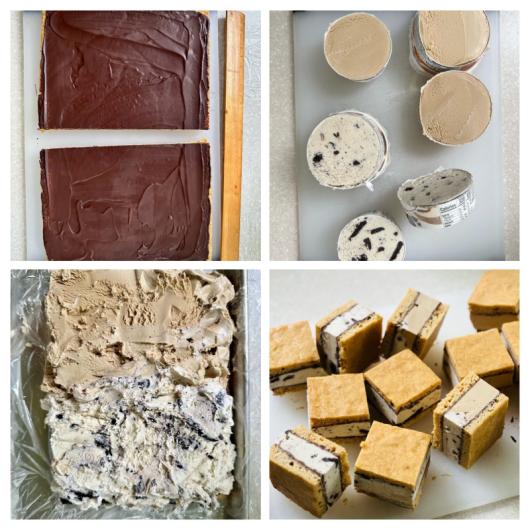
The success of the cookie layer relies on it being sturdy enough to handle the thick layer of ice cream (yum) yet soft and pliable to bite into it without the ice cream squishing out the sides and back (disappointing). The not-so-secret weapon to accomplish this goal is the Lyle’s Golden syrup (or the corn syrup) so don’t be tempted to leave it out.
Plan Ahead
Be sure to plan ahead as the assembled sandwiches need some freezer time to firm up before cutting and serving.
Two Ice Cream Flavors Is Better Than One
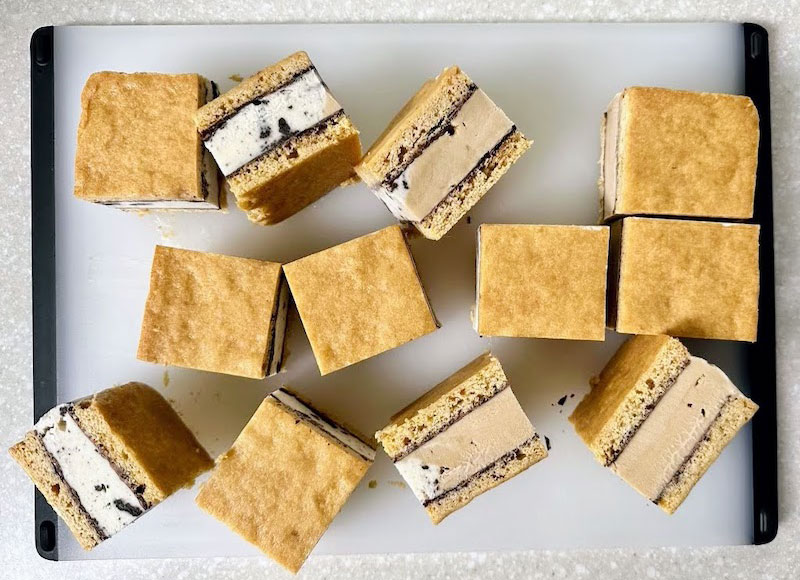
To give my family and friends options, I use two flavors of ice cream and arrange them side by side when assembling. Some folks go for one flavor, some reach for the other, and some lucky folks get a combo of both ice creams. Everyone’s a winner. My family likes coffee and cookies 'n' cream, but whatever flavors work for you!
Optional Homemade Ice Cream
If you want to use home-made ice cream (I recommend my No Churn Malted Vanilla Ice Cream), follow the recipe and line the loaf pan with plastic before adding the ice cream to make unmolding easy. Lightly coat the bottom and sides of the pan with oil, arrange two sheets of plastic wrap in a cross pattern over the pan and press into the bottom and up the sides of the pan to cover. Let the excess hang over the sides.
When ready to assemble the sandwiches, invert the ice cream block onto a cutting board using the plastic to help release it from the pan. Peel away the plastic, cut crosswise into six slices and continue as directed.
Keep It Cold
Using a well-chilled cookie sheet will help the ice cream stay chilled during assembly.
Nutty Sandwiches
Scatter 1/2 cup (2 ounces) finely chopped walnuts or pecans over the top of the batter before baking. It might be tempting to add sprinkles or mini chips instead of the nuts, but I don’t recommend it: when you pick up the sandwich to eat it, the chocolate chips will melt in your hands and make for a messy treat. Plus you’ve got that chocolate layer for the crunchy chocolate thing!
Time to Soften Ice Cream Varies
Depending on where you live, what season it is, how warm/chilly you keep your home, your freezer temperature (it should be set at 0°F), or what type of ice cream you buy, ice cream warming time will vary from a speedy 5 minutes to as much as 15 minutes.
Make Ahead Tip
The cookie layer can be made up to 1 day ahead or frozen up to 1 month before proceeding with the recipe.