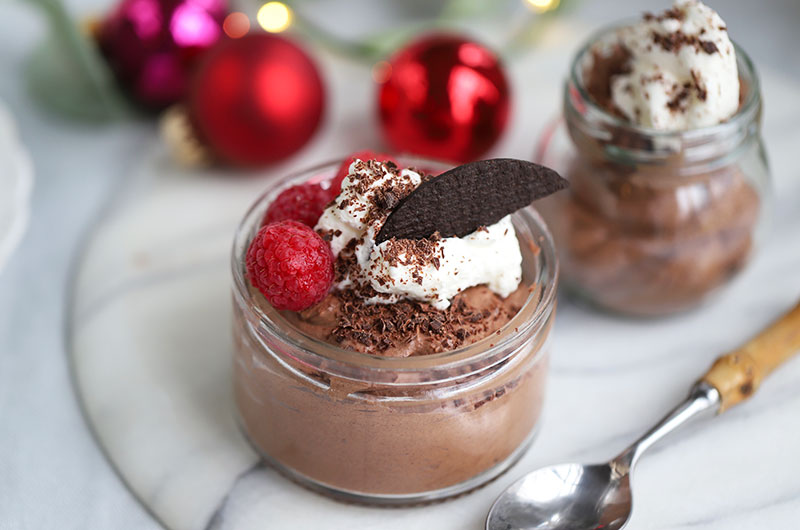
Deeply chocolaty and decadently rich, chocolate mousse is the crown jewel of desserts and the centerpiece of many holiday meals – mine included. Unlike most opulent and glamorous desserts, my version of this classic is surprisingly simple to put together. With only five ingredients and just a few easy-to-follow steps, this velvety smooth dessert can be made by cooks of all skill levels. What’s even better? It can and should be made in advance.
A quick internet search will show you that there are literally thousands of chocolate mousse recipes out there. Some have egg yolks or whipped whites or added cocoa powder while others have additional flavor pairings – orange, coffee or peppermint – but the base is always the same: good quality chocolate and heavy cream. That’s exactly where this recipe begins. I add a nob of butter for an even smoother texture, a splash of bourbon (or other liqueur or vanilla), and a pinch of salt – that’s it. I top it with lightly sweetened whipped cream and chocolate shavings or shards (see recipe below), and I have a showstopping dessert.
As glamorous as this dessert can be, it can also show up any time of the year and in unexpected places. Heading to a pickleball round robin or a neighborhood potluck or beach picnic? Portion the mousse (toppings included) into small, non-breakable cups and stow them in a cooler. Even in its dressed-down presentation, it will still illicit oohs, ahs and possibly a “Are you kidding me?!”
As with all of our Baking Together recipes, I encourage you to follow your taste buds and adjust the flavors and presentation. In Kitchen Notes (below), you’ll find options for infusing coffee, orange or mint into the mousse as well as options for creating layered parfaits with the mousse. We are looking forward to hearing how, when, and where you serve the mousse. It’s one of the best parts about us baking – and learning – together. Leave your notes in the comments section under the recipe.
And be sure to check out all our other Baking Together columns and recipes.
Kitchen Notes
Double the recipe
Serving a larger crowd? Double or triple it up! Just remember to use a bigger bowl for the larger amount of ingredients and allow more time for chilling the chocolate mixture before whipping.
Pipe with a zip-top bag
If you want to pipe your mousse into cups, a zip-top plastic bag is an easy substitute for a pastry bag. Fill the bag and snip off about 1/2-3/4 inch of one corner and you are set to go. No fancy piping tips but it gets the mousse in the containers quickly and cleanly.
Add Toppings or Layers
Top with whipped cream
I usually double the recipe for whipped mascarpone cream to serve on top of the mousse. Once whipped and piled onto the mousse, the cream holds up even over several days.
Garnish with chocolate shards or shavings
Chocolate shards (see recipe below) make for a jaunty topping. Chocolate shavings (use a vegetable peeler and a bar of chocolate) are fine, too, but if you want to learn the fun technique for making chocolate shards scroll down.
Add fruit or nuts
Any type of fresh fruit – chopped into small pieces if necessary – can be scattered over the whipped cream (with or without the shards) just before serving. Consider strawberries, raspberries, pitted cherries, peaches or even orange segments (also called supremes). Pomegranate seeds add a splash of holiday color, too. Feel free to top with a few sliced almonds or chopped hazelnuts for a crunchy texture.
Layer the mousse, parfait-style
Crisp cookies like cinnamon grahams or chocolate or vanilla, or even peppermint Girl Scout cookies, can be used in between layers of the mousse. I prefer to crush them into small or fine bits. The layered mousse can and should still be made ahead, but much like an old-fashioned ice box cake, the cookies will soften into a cake-like texture (Yum!).
Change up the flavor
Orange
Add finely grated orange zest to the melted chocolate mixture and substitute orange flavored liqueur in place of the bourbon or vanilla extract. Consider sprinkling a little orange zest over the whipped cream (with or without the shards) just before serving.
Coffee
Add 1/2 teaspoon instant espresso or coffee powder to the chocolate and cream mixture before heating and substitute coffee liqueur in place of the bourbon or vanilla extract. Consider sprinkling some crushed chocolate covered espresso beans over the whipped cream (with or without the shards) just before serving.
Peppermint
Add a hint of pure peppermint extract to the chocolate mixture along with the bourbon or vanilla extract. Consider sprinkling some crushed peppermint candies over the whipped cream (with or without the shards) just before serving.
Chocolate Shards
Use this recipe not just to top the mousse but for cakes and cupcakes, too.
- 2/3 cup (4 ounces) chopped semisweet, bittersweet, milk, or white chocolate
1. Melt the chocolate in a heatproof bowl in the microwave or set over a pot of barely simmering water, stirring with a heatproof spatula until melted and smooth.
2. Tear off two 15 x 12-inch pieces of waxed paper and arrange one piece of paper, curved side down, on the work surface. Pour the melted chocolate onto the center of the paper and use a small offset spatula to evenly spread the chocolate in a thin layer to within an inch of all edges of the paper.
3. Place the second sheet of waxed paper on top of the still-warm chocolate, aligning the edges and using your hands to gently press and smooth the paper over the chocolate to release most of the air bubbles.
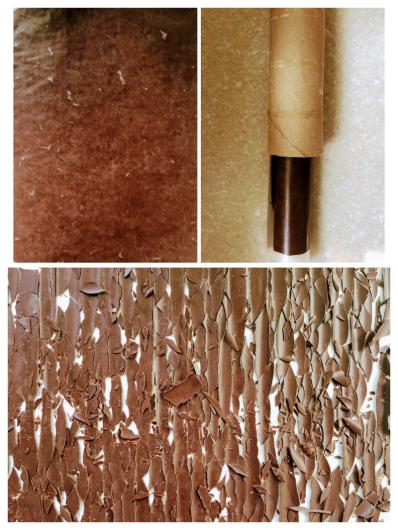
4. Holding the corners of both pieces of paper on one short side, roll the paper layers and chocolate together jelly-roll style. For narrower curls (for adding to ice cream or icing, e.g.), roll into a narrow, tighter roll. For larger, wavier curls (for the top or sides of a cake or pie), roll into a larger, wider roll. Slide into an empty cardboard paper towel tube and refrigerate until set, about 3 hours or up to 1 month. The roll can also be frozen for faster chilling or for those hot days when chocolate melts too quickly.
5. Remove the roll from the tube and set on a half sheet pan. Hold down one short end of the waxed paper firmly and unroll. As you unroll, the chocolate will crack and split, forming the shards. Peel away the top layer of paper and slide a long offset spatula under the chocolate to release the shards.
6. The shards can be used in larger pieces or broken up with the spatula (your hands can melt the chocolate!). Use immediately or fold the opposite shorter edges of the bottom piece of waxed paper together to form a shoot and slide the shards onto a flat plate or into a container or zip top bag. Cover, if necessary, and refrigerate until ready to use.